


Top Leading Manufacturer of Custom-Fit Seat Covers Since 1997
Custom Seat Covers Installtion - 2019+ Ford F150 / Chevy Silverado / RAM Trucks
Old Install Method - 4 Loop Elastics with “S” Hooks and 4 Buckles & Straps for each seat.
(We got rid of all the Elastics and Buckles and Straps!)
Old Install Time (Front Buckets) = 10 Minutes/ Bucket Seat
(We got rid of all the Elastics and Buckles and Straps!)
Old Install Time (Front Buckets) = 10 Minutes/ Bucket Seat
New Velcro Install Method - 3 Velcro Sections and Bunji Elastic for the perimeter of each seat.
New Install Time (Front Pair Buckets) < 3 Minutes/ Bucket Seat
New Install Time (Front Pair Buckets) < 3 Minutes/ Bucket Seat
Important to know: Ford Series & Ram
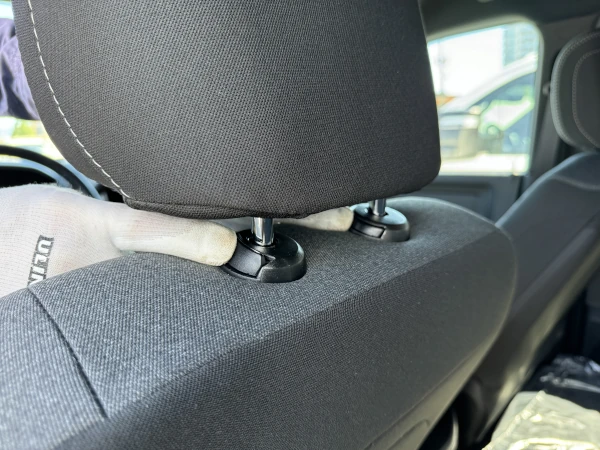
- Ford Series & Ram trucks have removable headrests
- Press the side buttons on the plastic guides for the headrest poles
- Lift upwards to remove the headrest
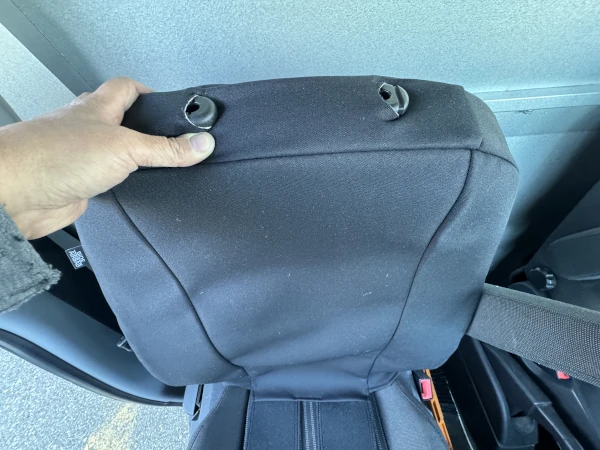
- Slide the back cover over the backrest
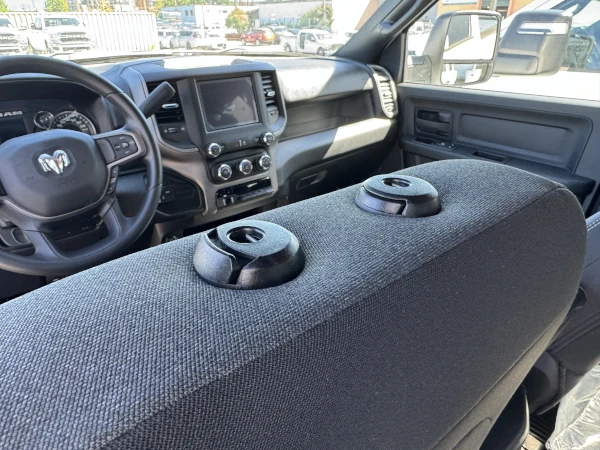
- It features pre-punched holes for the plastic guides of the headrests
- Simply slide the holes over the plastic guides and hide the hole under the rim of the guides
- Chevy Silverado & GMC Sierra: the headrests are not easily removable
- We've designed an easy install feature by using a zipper and a flap
- Open the zipper...
Installing the Backrest Cover - First
1. Open the zipper at the top of our backrest (1)

.webp)
(1)
2. Slide the Backrest cover, Diagonally, Over the Head Rest. (2)
.webp)
(2)
3. At the top of the backrest, Push the Fabric tab towards Rear and Pull the Zipper Back Up. (3a + 3b)
.webp)
(3a)
.webp)
(3b)
4. Pull the backrest cover all the way down and on the backside of the cover - Tuck it up into itself. (4a + 4b)
.webp)
(4a)
.webp)
(4b)
5. From the front, take the tail end of the backrest cover that has a small strip of Hook Velcro, Push the Tail-end through where the cushion and backrest meet. As you push the Velcro through, you will feel a Blocker - that is the Carpeted Bib (5)
.webp)
(5)
6. Go to the rear of the seat and grab that Tail with Velcro and Stick it to the Carpeted Bib. (6a)
Look at the face of the backrest and Adjust the tension of the Velcro to suit how tight you want the backrest cover to be. (6b)
Look at the face of the backrest and Adjust the tension of the Velcro to suit how tight you want the backrest cover to be. (6b)
.webp)
(6a)
.webp)
(6b)
Installing the Cushion Cover
7. The Front of the Cushion features a 2” Cap to Ensure the front of the Seat Cover remains secure. (7a + 7b)
.webp)
(7a)
.webp)
(7b)
8. Start with the Front Corner where the Plastic Side Trim of the Cushion is. (8a)
Diagonally wedge the seat cover between the plastic and the seat. (8b)
Pull - back and forth to easily get the cover securely behind the plastic trim. (8c) video
Diagonally wedge the seat cover between the plastic and the seat. (8b)
Pull - back and forth to easily get the cover securely behind the plastic trim. (8c) video
.webp)
(8a)
.webp)
(8b)
(8c)
9. Next - Pull the other side of the cushion cover so the front seams are aligned with the original seam line. (9)
.webp)
(9)
10. Push the Tail of the cushion cover, which has Velcro sewn to it - through to crack where the cushion and backrest meet. (10)
.webp)
(10)
11. Go to the rear of the seat and feel for the Tail with Velcro and pull it through and attach it to the Carpeted Bib. (11a + 11b)
.webp)
(11a)
.webp)
(11b)
12. Now, take the Rear of the backrest that we tucked up into itself at the beginning and Press the bottom of the backrest onto the carpeted bib. (12a + 12b)
.webp)
(12a)
.webp)
(12b)
Bunji Elastic
13. Pull the Left and Right sides of the Bunji Elastic - Nice and Tight - Tie New Loops and insert the “S” Hook into the loops. (13a + 13b)
.webp)
(13a)
.webp)
(13b)
The Bunji length we provide is fairly long so, you can Shorten it. This will maintain the tension of the new shortened Bunji Elastic.
- You can hide the Looped Bunji behind the bottom of the backrest cover.
- You can undo the bottom of the backrest and let the bunji go behind it and Re-Attach the bottom of the bakrest to the carpeted bib.
If you still have any question about installing our seat covers or installation isssues, please feel free to use our contact form or give us a call at 1-888-821-1066.